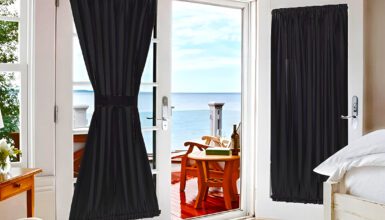
Waterproofing your outdoor drapes isn’t just smart; it’s essential for durability and longevity. The process can be as simple as a spray-on solution or as thorough as a professional treatment. Either way, it’s all about making sure your curtains can stand up to whatever Mother Nature throws their way. Stick around, and we’ll dive into the nitty-gritty of how to keep those curtains looking fab, come rain or shine!
1. Fabric Choice

First, let’s start with the first line of defense—choosing the suitable fabric. This is like picking a team captain; you want someone who will lead the rest of the squad to victory. So, what are the MVPs in the world of weather-resistant fabrics? Think along the lines of polyester, Olefin, and solution-dyed acrylic.
Why are these fabrics so great? Well, they’re naturally water-resistant or waterproof. That means they’ve got a head start in fending off rain, dew, and even those accidental sprinkler mishaps. And here’s a bonus: these fabrics usually come treated with additional mold and UV resistance coatings. It’s like getting a fabric that’s a good player and a well-rounded athlete.
But hold on, what about natural fibers like cotton or linen? They’re charming but not the best for weather resistance. These guys soak up moisture like a sponge, making them prone to mold and mildew. So unless you’re going for that “drowned rat” aesthetic, it’s best to stick with the heavy hitters for outdoor use.
Remember, picking a water-resistant fabric will save you time and money. It’s the first step in building a stylish but also smart and durable outdoor space. So choose wisely!
2. Water-Resistant Spray
You’ve picked your fabric and are ready to amp up the water resistance. What’s next? Say hello to water-resistant sprays! These bad boys are your new best friends for protecting those outdoor curtains. Think of it as an invisible shield, ready to take on rain, mist, or whatever comes your way.
Here’s how it works. You’ll want to take your curtains down and lay them flat or hang them up in a well-ventilated area—super important, folks! Shake that can of water-resistant spray like you’re mixing a cocktail and evenly spray it over the entire fabric surface. Once you’re done, let them dry completely. Still, feeling cautious? Go ahead and add a second coat.
A quick pro tip: always do a patch test first. The last thing you want is to ruin your gorgeous curtains with splotches or discoloration. Spray a small, hidden section and let it dry. All good? Then you’re clear to move on to the whole curtain.
You might wonder, “How often do I have to do this?” Well, it’s not a one-time gig. Reapplication will be your new hobby, especially if your outdoor area sees frequent rain or if you wash your curtains. But trust us, the peace of mind you get knowing your curtains are protected? Worth it.
3. Clear Plastic Overlays
Next, it is time to talk about the unsung hero of outdoor curtain protection: clear plastic overlays. These may not win any beauty contests, but they’re hard to beat regarding practical, no-nonsense waterproofing. Think of them as the raincoats for your curtains.
So, what’s the deal with these overlays? They’re sheets of clear, heavy-duty plastic that you hang in front of your curtains. The idea is straightforward: water hits the plastic, rolls off, and never reaches your drapes. It’s like having a bodyguard whose sole mission is to keep your curtains dry.
Installation is a breeze. Most options come with grommets, so just slide them onto your existing curtain rod. Want to enjoy the breeze without the plastic barrier? Simply slide them to the side or unhook them. Easy-peasy.
But let’s be real: clear plastic isn’t exactly high fashion. This might not be your first choice if you’re all about aesthetics. The good news is that these overlays are easy to remove when entertaining or snapping those Instagram pics. Remember to return them when you’re done, especially if rain is in the forecast.
So, if you’re the pragmatic type who values function over form or live in an area where rain is uninvited pretty often, clear plastic overlays could be your curtain’s best ally. They’re practical, effective, and, let’s face it, a bit nerdy—but in the best way possible!
4. Wax Coating
Next is the wax coating. It is some old-school charm with a touch of DIY flair. This technique has existed for ages, but don’t let its vintage vibes fool you. Wax coating is like giving your outdoor curtains a set of rain boots; they’ll wade through wet weather without a second thought.
So, how do you get your curtains waxed and ready to repel water? First up, you’ll need a fabric wax bar. You can easily find these online or at specialty outdoor stores. Next, take the wax bar and rub it all over the surface of your curtain fabric. Think of it like coloring, but instead of staying within the lines, you aim for full coverage.
Now, don’t rush off yet! Grab a hairdryer and set it on a medium to high heat setting. Go over the waxed areas, melting the wax into the fabric. This step ensures the wax is evenly distributed and fully integrated into the material. Voilà, your curtains are now weather-ready!
A couple of things to note. Waxing can alter the texture of your fabric, making it a bit stiffer. It might also darken the color a bit. So, if you’re dealing with lighter or more delicate fabrics, do a patch test first.
And just like with water-resistant sprays, this isn’t a “set it and forget it” solution. The wax will wear off over time, especially in high-traffic or high-rain areas, so that reapplication will be on your to-do list.
5. Professional Treatment
Lastly, let’s say you’ve got zero time for DIY, or maybe you just want to go the Cadillac route and leave it to the pros. Enter professional treatment for your outdoor curtains. This is the red-carpet VIP experience where you hand over the reins and let the experts work their magic.
Why go pro? First, professionals use industrial-grade solutions that are often more durable and effective than DIY options. We’re talking about long-lasting, heavy-duty protection tailored to your specific type of fabric. It’s like hiring a personal trainer instead of winging it at the gym—sometimes, expert guidance makes all the difference.
So, what’s the process like? Well, you’ll start by taking down your curtains and bringing them to a specialized service. They’ll do a thorough assessment to determine the best treatment method. Once that’s sorted, they’ll apply the water-repellent coating, usually through a process that ensures every inch gets evenly treated.
But wait, there’s more! Many professional services also offer other protective treatments, like UV protection, stain resistance, and mildew resistance. It’s like getting a full spa day for your curtains, complete with multiple treatments for ultimate pampering.
Now, the downside? It can be a bit pricey compared to DIY methods. But, suppose budget isn’t a concern; you’re after top-notch, worry-free results. In that case, professional treatment is a no-brainer.
Maintenance Tips
Alright, you’ve done the hard work of waterproofing those outdoor curtains. High five! But hold on, the journey isn’t over just yet. Maintenance is the unsung hero that keeps the dream alive. Think of it as the yearly check-up that keeps you in top shape.
First thing first: cleanliness is critical. Dirt, leaves, bird droppings—you name it, it’s all bad news for your curtains. These nasties can break down the waterproof coating over time. So, get out there and give those curtains a gentle yet thorough cleaning. Most fabrics can handle mild detergent and water but always check the care instructions.
Now, let’s talk about reapplication. Yep, you heard it. Waterproofing treatments aren’t a “one and done” deal. Whether you’ve gone the DIY route or opted for professional treatment, you must refresh that protective coating. How often? That depends on your local weather conditions and how much love your curtains get. But generally, consider reapplying at least once a year.
But what if you notice your curtains starting to soak up water instead of repelling it? That’s a red flag, my friends. It’s time to break out the waterproofing spray or schedule another pro treatment. Don’t procrastinate; water damage can lead to mildew, and nobody’s got time for that.
One more pro tip: take your curtains down during extreme weather or when you know you won’t use your outdoor space for a while. Not only does this extend the life of the waterproofing treatment, but it also gives your curtains a well-deserved break.
So there you have it! Whether you’re a DIY enthusiast or prefer a pro touch, these methods will keep your outdoor curtains looking fresh and free from water damage. Choose the one that works best for you and enjoy that outdoor oasis, rain or shine!


